Gluten Free Basic White Cake
I’ve written this post a million times over since I decided to host this month’s Gluten Free Ratio Rally. Way back in the beginning, I signed up for this with high hopes – and I was being completely selfish when I chose the task: cakes. And white/yellow cakes. (Sorry, chocolate cake fans..although a few bloggers appealed to you, I was really on the hunt for fabulous GF white cakes.)
I say selfishly because I do have some fabulous cake recipes. My favorites are mysponge cake recipe and the mini-vanilla filled cupcakes. But really, I have been longing for layer cakes due to their versatility. My favorite cakes have always been white layer cakes. It’s true! Even since I started making cakes in our house when I was in elementary school. (I did a fine job of both trashing the kitchen and baking a decent cake.) My favorite white cake recipe is still being worked on to convert it to gluten free. I needed some help. And some inspiration.
And (I hoped) I can’t be the only one with an aversion to chocolate cakes. (Right??)
And I say that reluctantly because I know that some very fabulous people in my life have made some incredible flourless chocolate cakes for me (birthdays at work, etc). I’ve eaten each slice with a smile. But I have a confession to make: I’ve never liked chocolate cakes. At the age of six, I completely overindulged: chocolate cake + chocolate ice cream + first day in new state/neighborhood/house = bad news for the future of chocolate cake in my life. I am refraining from using details here … after all, this *IS* supposed to be a food blog.
So you see, I am selfish in my quest for the *perfect* gluten free non-chocolate cake. I’m not the only one who realizes the beauty of a white cake – the versatility, etc. Oh yes. A white cake is where it is at, people! And you will see from this month’s ratio posters just how fabulously versatile it is!
I fell on a sword this month taste-testing over 9 cake recipes ideas in four weeks. Not too pointy of a sword, mind you. If the cake tasted great, but failed? I have crumbled them into a baggie and made some “cake pops” for my daughter(s) and I. We share one “cake pop” after swim lessons. But I think I’m going to have to invest in some swim time for myself after a month of cake eating. Ay ay ay!
I’ve discovered a few things about cake baking – especially gluten free cake baking – that I’d taken for granted previously.
- Watch your baking time CAREFULLY and check often – especially within the last 5-6 minutes. An over baked gluten free cake = theSahara Desert in your mouth.
- Have your eggs and butter at room temperature. But don’t do this if you live without air-conditioning and your house is 80F. Not cool.
- Add your eggs one by one and beat them in for a couple of minutes before adding the next. (No matter how hard your child pulls on your legs/hands. Add the eggs one at a time!)
- Parchment lined/bottomed cake pans are just as fabulous as dusting them with gluten free flour – and easier for me.
- Gluten free cake batter is definitely thicker than gluten-filled cake batter. Don’t stress when you see it.
And most importantly: the RATIO makes a difference. You really do have to measure the flours by weight if you are going to change up the flours you chose to use. If you see a cake within the several that will be shared today as part of the rally, please do take the time to use the flours they chose to use. For each of the cakes I made, I used 228g of flour. Sometimes this was the equivalent of 1 cup of rice flour + 1/2 cup tapioca flour OR 1 cup of rice flour + 1/3 cup potato starch OR 1 cup millet flour + 1/2 cup + 2 Tablespoons sweet rice flour. Yikes.
I wanted to make a cake that anyone could make with readily available flours that are relatively inexpensive as far as gluten free flours go. I wanted it to be something your best friend could make for you or your mom or your colleague if they wished to. So many times our diet is intimidating and expensive. I just wanted to simplify it all. (And I’m not going to tell you about my initial starts of using whole grains, less sugar, etc because <girl smacks self in head now> I was making a cake. I gave myself permission not to think about applesauce in lieu of butter, etc. I just wanted a cake. And a good one at that.
I ended up with several. From one recipe too.

The basic cake. With only the primary frosting on. I had intended to frost this further, but the Chicklet got a hold of the sprinkles and she went to town. So, it stayed just like this: minimal frosting and a fabulous crumb.

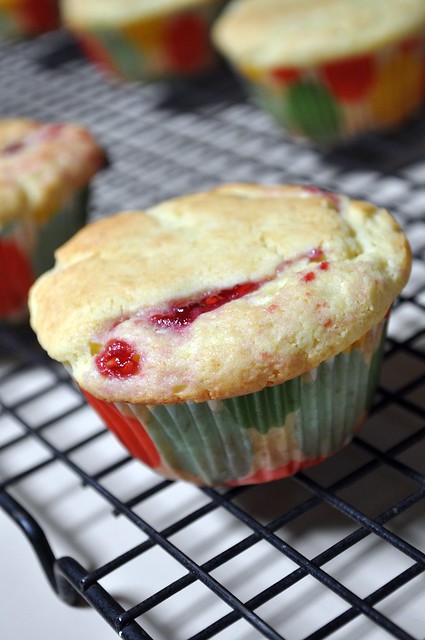
For these little cupcakes, we filled them with a dollop of raspberry jam – (and some with Nutella – YUM!). No frosting was needed.
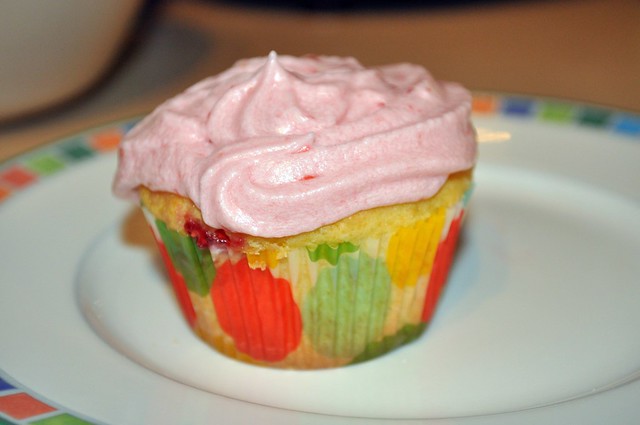
 Similar to the one above, filled with sliced strawberries and topped with fresh strawberry buttercream frosting. All things pink are met with approval from the Chicklet.
The ratio for a basic cake is as follows:
1:1:1:1
Egg : Sugar : Flour : Butter
I’m not convinced that I’ve achieved the cake I dream of. But, in looking at the titles of the cakes of my fellow GF Ratio Rally participants, I see that I have a fabulous future of cake testing ahead of me. (Tiramisu! Confetti Cake! Lemon Tea Cake! – just to name a few!) Maybe one of you will find a way to make it even more fabulous. That is the beauty of being a gluten free community: learning, sharing and growing together.
Basic Gluten Free White Cake
Ingredients:
- 8 ounces – 1 cup (2 sticks) of butter, room temperature
- 8 ounces – 1 cup (226 grams) sugar
- 4 eggs + 1 yolk
- 3/4 teaspoon almond extract
- 1 1/2 teaspoons vanilla extract
- 226 grams “My” gluten free flour mix, sifted (1 1/2 cups + 2 teaspoons)
- OR 175 grams (1 scant cup) rice flour + 50 grams (1/3 cup) potato starch
- 2 teaspoons baking powder
- 1/4 teaspoon salt
Directions:
- Preheat oven to 350F. Line the bottom of two 8 inch cake rounds with parchment paper OR butter each and flour with rice flour (NOT the rice flour called for in the recipe – please use 1 Tablespoon or 2 in addition to that called for in the recipe).
- Beat butter in the mixer until light and creamy.
- Add sugar. Beat again for several minutes (3-4) on medium until light and fluffy.
- Add one egg. Beat for 2 minutes. Add next egg and beat again 2 more minutes. Repeat until all eggs have been incorporated thoroughly.
- Add extracts. Mix in.
- Sift together flour(s), baking powder and salt. Add to cake batter. Mix in carefully so as not to lose the softness created from mixing in the eggs/sugar.
- Divide into cake rounds evenly. Smooth the surface with a wet spatula. (I found it helpful to have a glass of water nearby and I kept dipping the rubber spatula into the water to keep the batter from sticking.)
- Bake until the top is just golden brown and a toothpick (or cake tester) inserted comes out shiny but not sticky – about 18-20 minutes. Check your cake as you approach the 15 minute mark at a minimum to avoid over-baking.
- Remove from pans by flipping on to cooling racks after removing from the oven. Allow to cool completely before frosting.
If you want to, this recipe easily converts in to cupcakes. Bake for 15 – 18 minutes for 12 cupcakes. When making cupcakes, we loved adding dollops of goodness (homemade raspberry or strawberry jams, Nutella, etc) in to the center of each cupcake and then we topped them with more batter. These additions also added moisture to the cakes as well and helped them last longer. (Well, as long as a cupcakes can last around kids.)


Tidak ada komentar:
Posting Komentar